

|
Tree Varieties
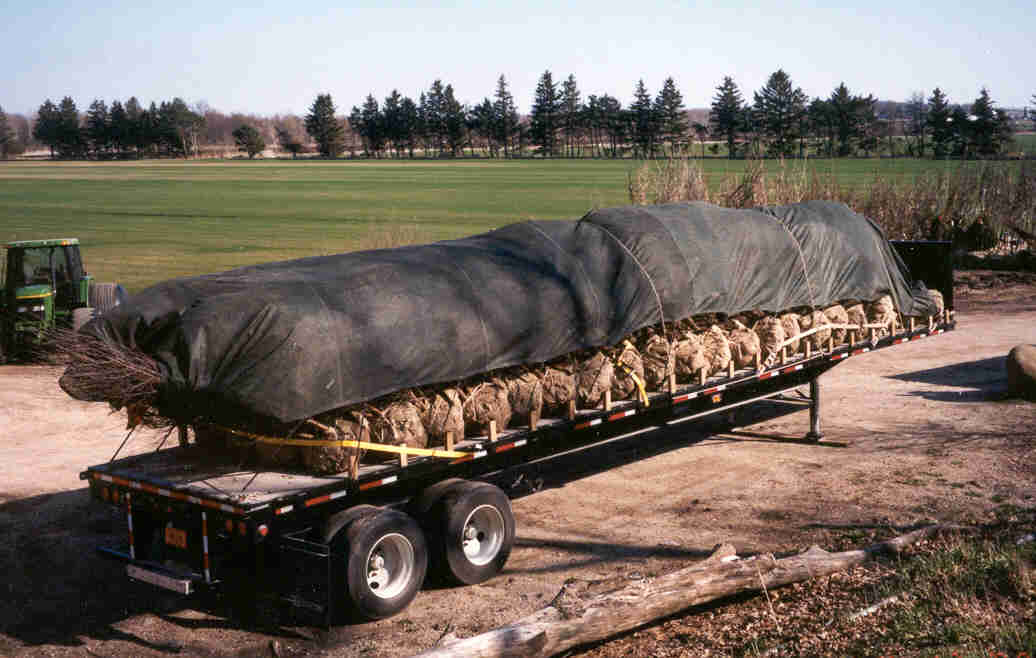
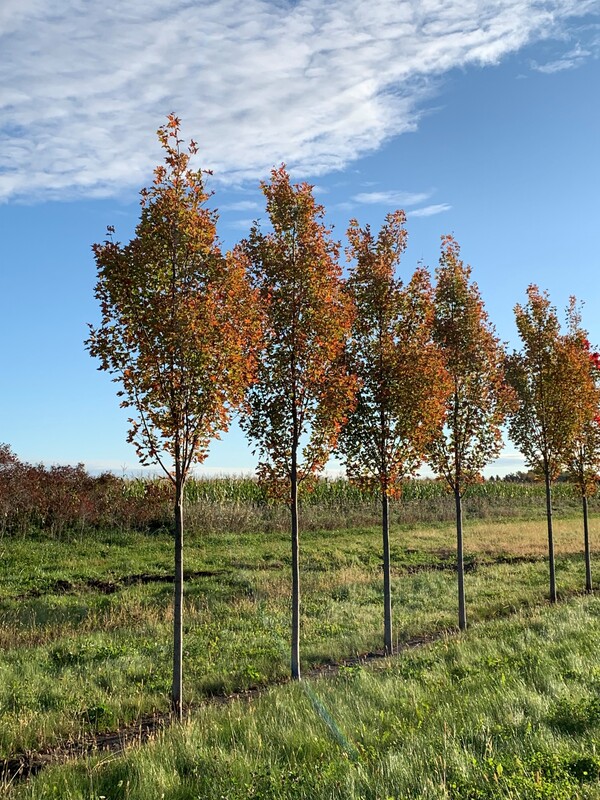
We offer a great selection of evergreen and deciduous trees. All the trees we sell are grown in our own nursery, ensuring a durable, well-developed tree. Our nursery stock brings us great pride, so we go the extra mile and use the utmost care in growing a quality product for your business or home project, which you will be able to enjoy for years to come.
The deciduous trees that we sell are between 2 - 4" in diameter and between 8'-20' tall. All trees we sell are balled and burlapped.
|
| ||||
If you would like to order one of our trees,
please call us at 608-655-3600 or 888-398-3604.
Or you can fax your order to 608-655-3624.
please call us at 608-655-3600 or 888-398-3604.
Or you can fax your order to 608-655-3624.
Installation and Care
New Tree Planting
Attention to proper placement and planting will enable you to grow attractive, healthy trees that will provide years of enjoyment.
New Tree Planting
Attention to proper placement and planting will enable you to grow attractive, healthy trees that will provide years of enjoyment.
|
Selecting A Location
|
Trees should be placed so that they may develop freely without crowding each other, buildings, utility lines or other structures. Before selecting an exact spot for a tree, determine the tree's mature size. Be sure to get the correct information for the specific variety of your tree.
You can decrease future maintenance problems by careful and thoughtful placement of trees. Due to their size, shade trees should be placed well away from homes or other buildings. Large shade trees should be placed about 50 feet from other large shade tree varieties for best results. Medium-sized trees such as red maple or river birch should be spaced about 35 feet apart. Redbud, hawthorn, crab or other small trees may be planted 15-20 feet apart and at least 8 feet from buildings. |
Planting The Tree
|
Caution: Always pick up the tree by the root ball, not by the trunk. The ideal time to plant trees is during the dormant season-fall (after leaf drop) or early spring (before bud break). This period of cool weather allows plants to establish roots in their new location before spring rains and summer heat stimulate new growth. However, as long as the tree has been properly cared for, it is acceptable to plant throughout the growing season.
Proper planting is essential to ensure a healthy future for new trees. Take time to carefully follow the simple steps listed below. |
|
1. Dig a large planting hole Caution: Be sure you have had all underground utilities located prior to digging. The planting hole should be dug as deep as the root ball and twice as wide. A large-sized hole is important because as the tree begins to take hold in the ground, its new roots must push though the surrounding soil. Roots will have a difficult time if the soil is rocky or compact. However if the soil has been loosened by digging and backfilling, the roots will have room to establish well.
2. Prune sparingly - Examine the tree closely for injury to roots or branches. If any roots are crushed, cut them at a point just in front of the break. On the top, prune only broken branches, making sure to leave the branch collar (swollen area where one branch meets another) intact. Begin corrective pruning after a full season of growth in the new location.
3. Prepare the hole and the soil - Newly transplanted trees benefit from an application of plant food. Use slow release tree spikes or packets per written instructions.
4. Place the tree at the proper height - To avoid damage, when setting the tree in the hole, always lift the tree by the root ball, never by the trunk. Add a sufficient amount of soil to the planting hole to bring the tree soil ball 2-3” higher than the existing soil grade. Planting at the proper height is important because if a tree is set too deep, its roots may suffocate.
5. Removing the wire basket - Remove the wire basket only if the root ball is likely to stay together without it. If the condition of the root ball is soft or the soil is loose in the root ball, leave the basket on. If the root ball is firm and in good shape the wire basket may be removed.
Here's How:
- Place the tree as close as possible to the planting hole.
- Using wire cutters, cut the bottom of the wire basket off, leaving the wire sides, burlap and rope intact. Gently place the tree in the planting hole.
- Once in the hole straighten the tree and check for proper planting depth. The root flare is where the trunk stops and the tree roots start. This is called the collar region and should be at or above ground level. If not, adjust accordingly.
- Once properly positioned, backfill the hole 1/4 of the way to stabilize the tree.
- Cut the wire basket along two sides of the basket. At this time also remove the twine that goes from the basket to the trunk. Once the twine is removed, the two halves of the wire basket can be lifted out.
- Remove the burlap from the top of the root ball and a little ways down the sides. The burlap will have pinning nails that are sharp, so use gloves when handling.
- Throw out the burlap. Three ply sisal rope once removed may come in handy as a spare rope. The rope and burlap should not be left in the hole. The steel basket will be in three pieces. This material is recyclable as scrap steel. If you do not have a place to recycle the steel you can return it to us; we would be happy to add it to our recycle pile.

6. Fill the hole gently but firmly - If the tree is balled and burlapped, cut the string and remove all accessible burlap. Perforate the sides of the basket in four or five places and break off the top rim. Be careful not to make these punctures too big; they should allow roots to penetrate into the soil, but not cause the basket to fall apart.
Fill the hole by gently firming the earth around the tree to hold it in place and to eliminate air pockets. These air pockets may cause some roots to lose contact with the soil and dry out. To avoid this problem, settle the soil with water and add soil to the hole until the tree is firmly established. Do not use your feet to tamp around the tree base. This compacts the soil and may inhibit the spread of roots. Rake a ridge of soil two to four inches high around the margin of the hole (outside the root area) to serve as a reservoir when watering.
7. Stake the tree if necessary - Staking a tree can cause bark damage, so it should be avoided where possible. However, if a tree is too tall to stand alone or has a weak root system it should be staked to avoid shifting during heavy rains or high winds, as such movement can easily damage tender roots. Staking must be done very carefully with a broad, soft strapping material such as woven belt fabric or padded wire.
8. Mulch the base of the tree - Mulch is simply organic matter applied to the area at the base of the tree. A 2-4" layer conserves soil moisture and protects newly planted tree roots from hot and cold temperatures. Mulch also keeps down weeds that may compete with a newly planted tree for water and nutrition until the tree takes a firm hold.
9. Water - Since many roots were removed when the tree was dug in the nursery, regular watering is important to aid the development of a strong new root system in the new site. Keep the soil moist but not soaked, as over watering will cause leaves to turn yellow or fall off. When the soil is dry 4" below the surface, it is time to water. Continue regular watering until mid-fall and then taper off, as this is when the tree slows growth and hardens for winter.
After you have completed the simple steps, further routine care and favorable weather conditions will ensure that this new tree will grow and thrive. A valuable asset to any landscape, it will provide a long-lasting source of beauty and enjoyment for people of all ages.
Mature Tree Care
Think of preventive health care for trees as an investment in natural beauty that pays big dividends.
The value of a healthy tree increases as it ages, and some tree species, such as oak and walnut, can live as long as 200-300 years, so providing regular care for your trees is like putting money in the bank. Remember also that curing a problem once it develops is much more difficult, time-consuming and costly than preventing one. Therefore, it is worthwhile to give your trees regular maintenance to ensure that they are able to offer enjoyment and value for generations.
Tree maintenance programs should include: inspection, mulching, fertilizing and pruning.
Tree Inspection
Tree inspection is an evaluation tool used to call attention to any change in the tree's health before the problem becomes too serious. During the inspection, be sure to examine four characteristics of tree vigor: new leaves or buds, leaf size, twig growth and crown die back. Some signs of poor tree health are stem decay and crown die back (gradual death of the upper part of the tree).
Mulching
Mulching can cut down on stress by providing a tree with a stable root environment that is cooler and contains more moisture than the surrounding soil. Mulching can also prevent mechanical damage by keeping machines such as lawnmowers away from the tree's base. Further, mulch acts to reduce competition from surrounding weeds and turf.
To be most effective in all of these functions, mulch should be placed 2-4" deep from the base of the tree (at least 2 feet for young trees). When possible, mulch should extend 2-3 times the branch spread of the tree. An adequate mulch layer is 2-4" of loosely packed organic material such as shredded leaves, peat moss or composted wood chips. Plastic should not be used because it interferes with the exchange of gases between soil and air and inhibits root growth. The thickness of the mulch layer is important; mulches 5-6" thick may inhibit gas exchange.
Fertilization
Fertilization is another important aspect of tree health care. Fertilizer is best applied in the fall or early spring, although it is not harmful to apply fertilizer at any time during the year. In addition to providing minor nutrients, fertilizers increase the amount of three major nutrients in the soil: nitrogen, phosphorous and potassium.
Nitrogen (N) is possibly the most critical of these nutrients. It is the element most responsible for maintaining the green color in leaves and for normal twig growth. Because nitrogen is rapidly depleted from the soil, it must be replenished regularly to ensure plant health.
Phosphorous (P) assists in the maturation of tissues and stimulates root growth. It is particularly important in flower, fruit and seed production. Fortunately, phosphorous in the soil is not depleted as rapidly as nitrogen, yet its scarcity may limit the number of plants that can thrive in a particular area.
Potassium (K) assists in the manufacture of sugar and starches, helps tissue mature properly, and heightens the color of flowers. Plants without enough potassium may become either too succulent or too brittle.
Various fertilizer mixtures contain different amounts of these and other nutrients. Soil conditions, especially pH and organic matter content vary greatly, thus the proper selection and use of fertilizer is an important and complex process. When applying fertilizer remember that nitrogen can be applied directly in the soil surface, whereas phosphorous and potassium, like other insoluble nutrients, should be applied via holes in the soil.
Pruning
Pruning or trimming should be done regularly to control a tree's shape and keep branches from harming surrounding structures or people. For most trees, the best time to prune is winter to early spring. Trees pruned at this time of year close their wounds more quickly. Exceptions to this are trees that have problems with disease in the spring. Oaks and honey locusts are examples of trees that are susceptible to disease if pruned during rainy spring weather. Pruning should always be performed sparingly. Over pruning is extremely harmful; without enough leaves, a tree cannot gather and process enough sunlight to survive.
In some cases, however, pruning is absolutely necessary because damaged limbs pose a threat to other healthy parts of the tree or surrounding structures.
Pruning also directs the growth pattern of a tree. Branches typically grow in the direction that the buds are pointing, and the outermost bud on a branch has the most influence on the direction of future growth. Therefore, you can control the orientation of a branch by carefully selecting the pruning cut's location. Cut so that the outermost bud on the branch is pointing in the direction that you want the branch to grow.
Pruning a dead branch - A dead branch stub that has a collar of live wood should be cut just at the outer edge of the collar (swollen area where one branch meets another).
Pruning a live branch - Remove a large limb by making three cuts: 1. Undercut 12” to 24” from the branch collar. 2. Make a top cut all the way through the branch, within 1” of the undercoat. 3. The final cut should be just beyond the branch collar.
Once you begin a cut, always finish it. Prune limbs and branches so that you preserve the branch's collar. This often appears as a collar of rough bark on the trunk that formed in the “Y” of a growing branch. The final pruning cut should also be angled so that it begins in the crotch and extends down and outward at an opposite angle as the branch collar. This will not result in a cut flush with the trunk; rather, the base of the cut will extend out from the trunk.
A healthy tree will heal on its own, so wound dressings, which may actually interfere with this process are not necessary. To aid in the recovery of cuts, water and fertilize your trees well. If you are not confident in the particular pruning need of your tree, contact you local tree care professional.
|
Browse Our Website
|
Contact Information
|
|
Like Us On:
|
|
|